One of the best features of Sprout Invoices is its ability to integrate other applications, helping them become a part of the invoices you can create. WeForms allows you to create forms that you can use to interact with customers or potential customers who are viewing your website. The weForms integration allows you to create quotes and invoices, leveraging the power of online forms as well as the Sprout Invoices plugin. You can even set up the payment system and receive payments from the custom forms themselves.
This article will walk you through enabling the weForms integration with Sprout Invoices and setting up a form that is mapped to Sprout Invoices fields.
- Enabling the Sprout Invoices Integration
- Configuring the Sprout Invoices Integration
- Working with the Sprout Invoices Payment System
Enabling the Sprout Invoices Integration
In order to use the Sprout Invoices integration, you will first need to have Sprout Invoices installed.
The free version of weForms is sufficient, but it should be noted that numeric fields are not available unless you upgrade to weForms Pro. Additionally, if you intend to use Sprout’s payment system, you will also need to upgrade Sprout Invoices to the Pro version.
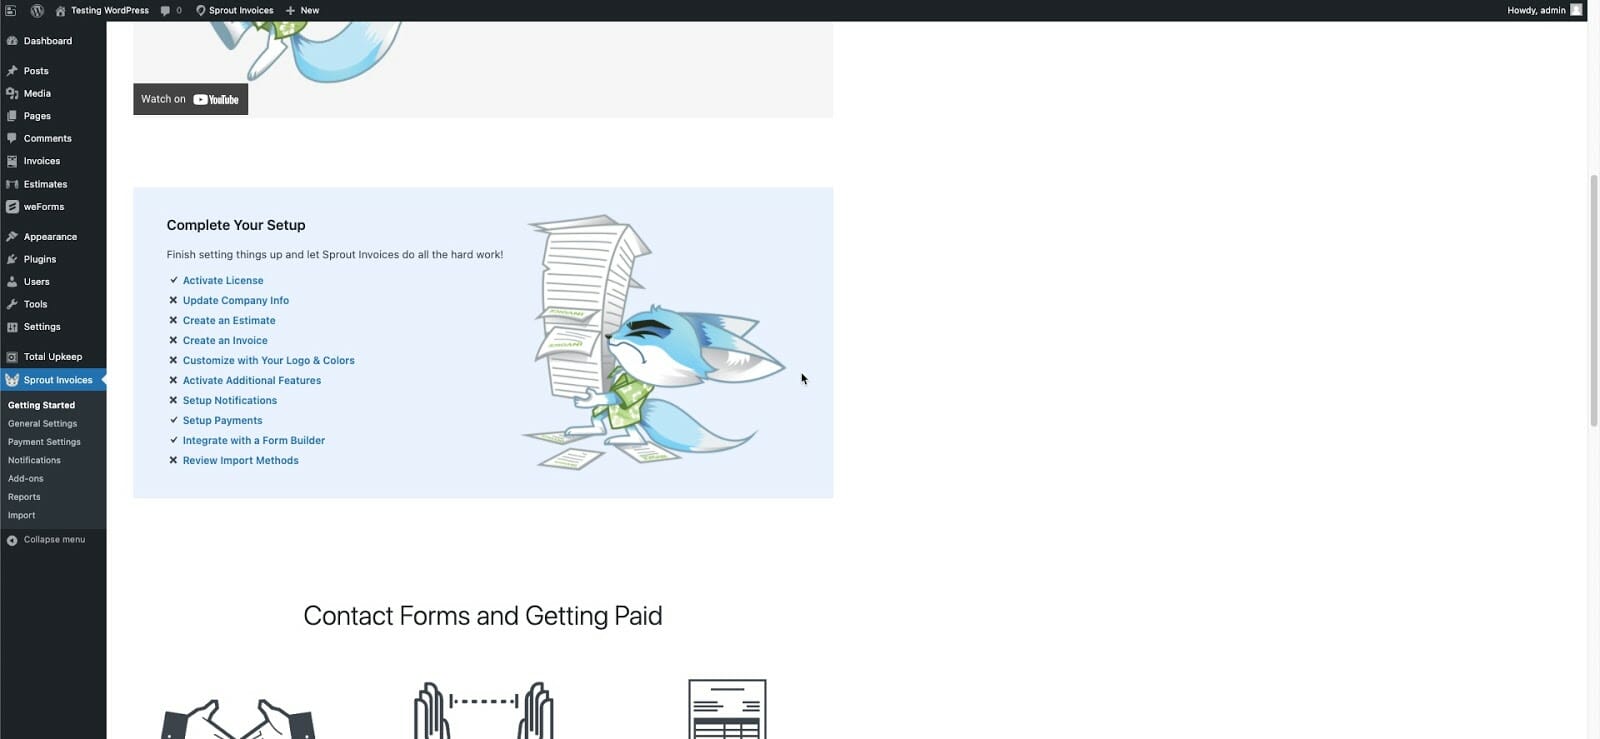
- Log in to the WordPress Administrator.
- Click on weForms in the menu, then click on All Forms.
- You will see a list of any existing forms. If you want to create a new form, then select one from the templates, or click on Blank form. Otherwise, click on a form to edit.

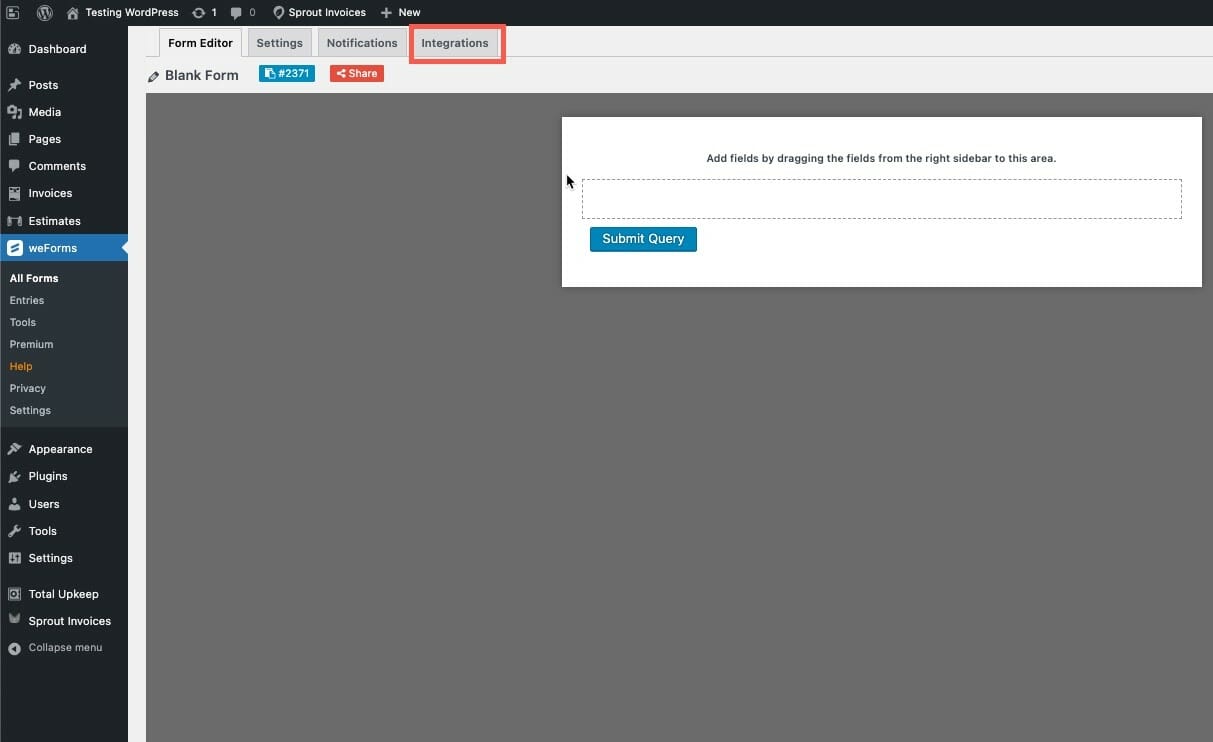
- Before you start adding to the form, click on the Integrations tab.

- You will see several cards that may or may not be grayed out. The Sprout Invoices card should be located in the top right line of integration options. Click on the slider tab to enable it.


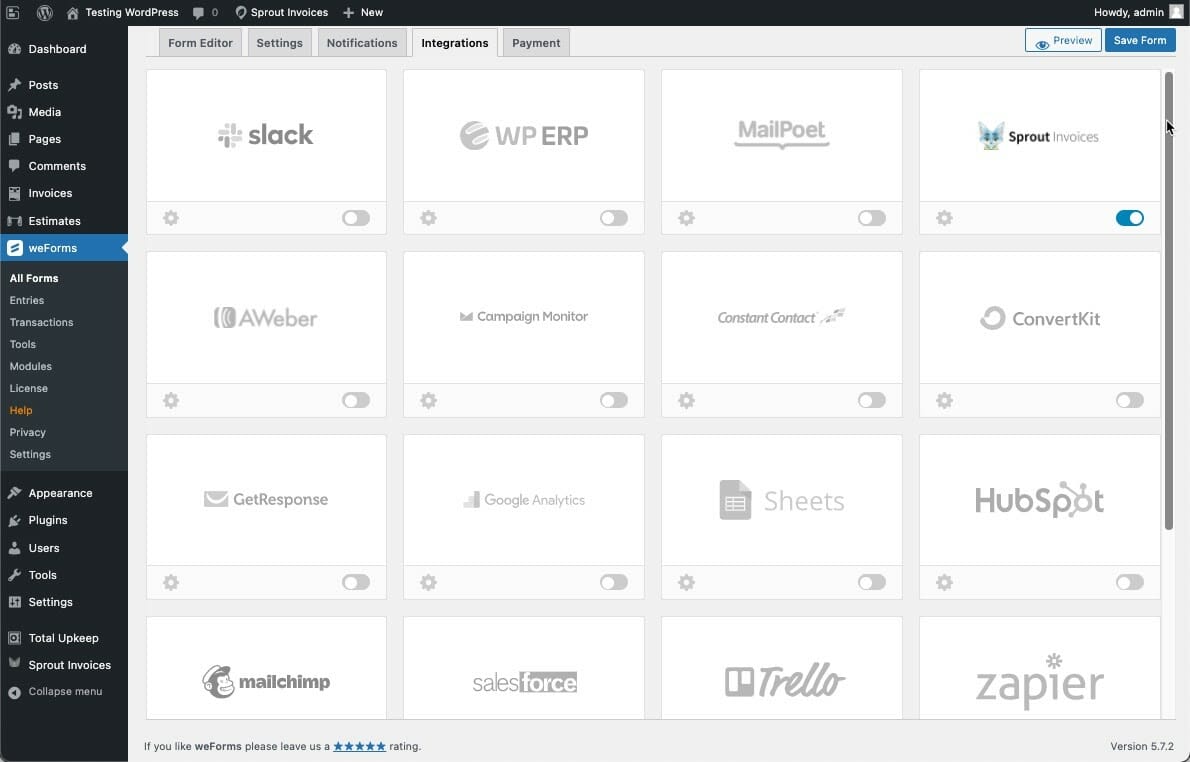
Once the integration is enabled, you can go back to building your form. If you were using an existing form or select a template with existing fields, you can move on to the next part of this tutorial.
Configuring the Sprout Invoices Integration
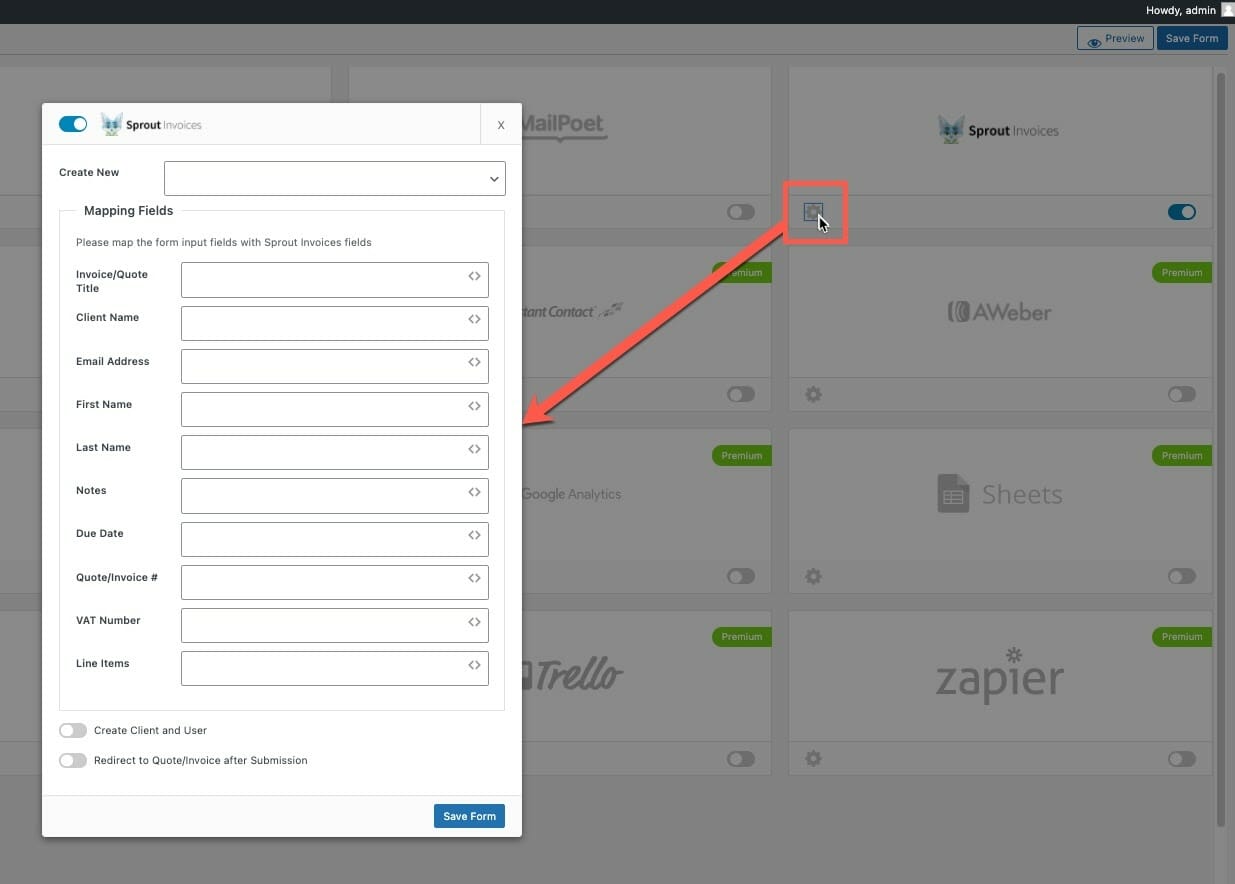
The Sprout Invoices plugin uses several values to create quotes or calculate invoices. These values must be mapped to the form fields that are part of the form you have created. The integration provides this option through the gear icon in the lower-left portion of the card
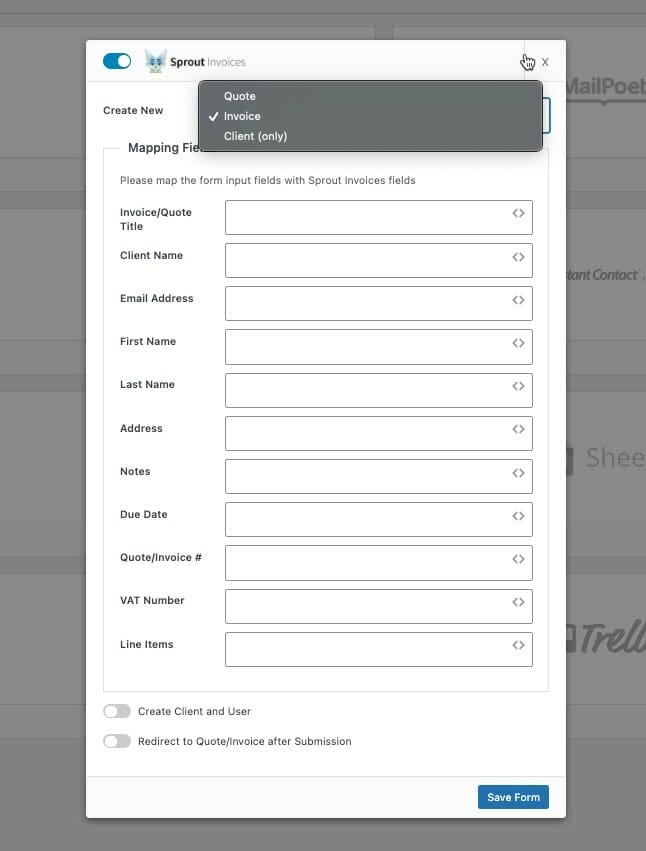
- Click on the gear icon to see the mapping options for your form.

- Click on the drop menu next to Create New at the top of the form. You will be able to choose if you’re creating a quote, invoice, or client(only).
Quote – Estimate for service or product you’re offering to a customer.
Invoice – Bill for the sale or performance of a service or product that you have provided
Client (only) – Create a client that can be managed in the Sprout Invoices plugin

- When you get to this point, it’s often beneficial to have either written or printed the fields you’re using in your form. It will help you to map the fields. Sprout Invoices advises that the following fields be mapped:
– Invoices/Quote Title
– Client Name
– Email Address
– First Name
– Last Name
– Notes
– Quote/Invoice #
– Line Items
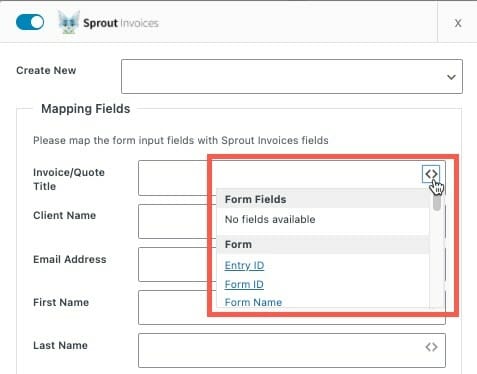
When you’re mapping your form fields, you can select the form fields by clicking on the “<>” symbol at the right side of the. You can see this in the screenshot below:

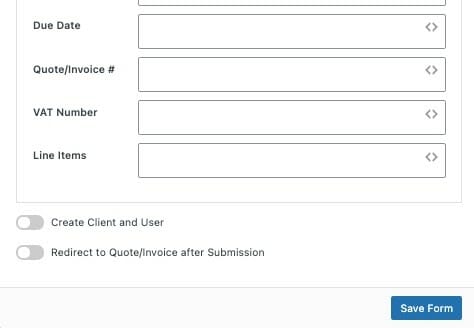
- At the bottom of the form you see two options (sliders):

Create Client and User – this will allow you to create and manage the client or user in the Sprout Invoices plugin. Redirect to Quote/Invoice after Submission – Redirects user directly to the Sprout quote or invoice after it has been submitted. - Click on Save Form to save your changes
Remember that working with any numbers in the form will require the Pro version of weForms, so it is highly recommended that this be installed before using Sprout Invoices where address, phone numbers, quantities, cost are common fields that will need to be displayed.
Working with the Sprout Invoices Payment System
Before you can use Sprout Invoices to accept payments for your invoices, you will need to complete the configuration of the Payment Settings for the plugin.
Note: If you have not upgraded to Sprout Invoices Pro, then you will not see the option to configure these settings.
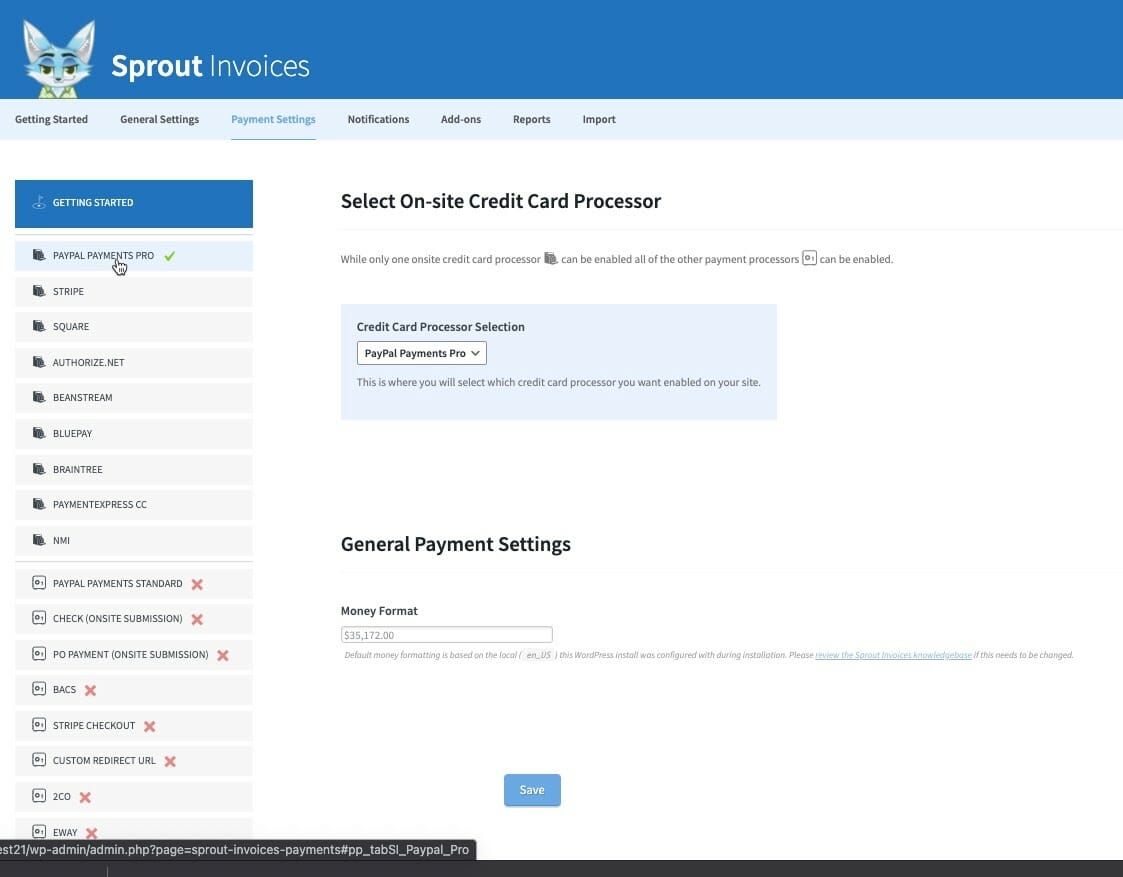
Sprout Invoices has settings for an onsite credit card processor and online credit card processors. You are permitted to configure one onsite processor and any number of online processors.
To edit the payment settings:
- Login to the WordPress Administrator.
- Click on Sprout Invoices in the main menu.
- You will then either see the Sprout Invoice Screen, or you can click on Payment settings (a submenu under the Sprout Invoices menu item).

- You will see a list of credit card processors. The top list is for the one onsite credit card processor that you can enable. The bottom list is for online credit card processors. You can enable any number of online credit card processors, but you must be registered to use it. Additionally, there may be fees associated with its use.

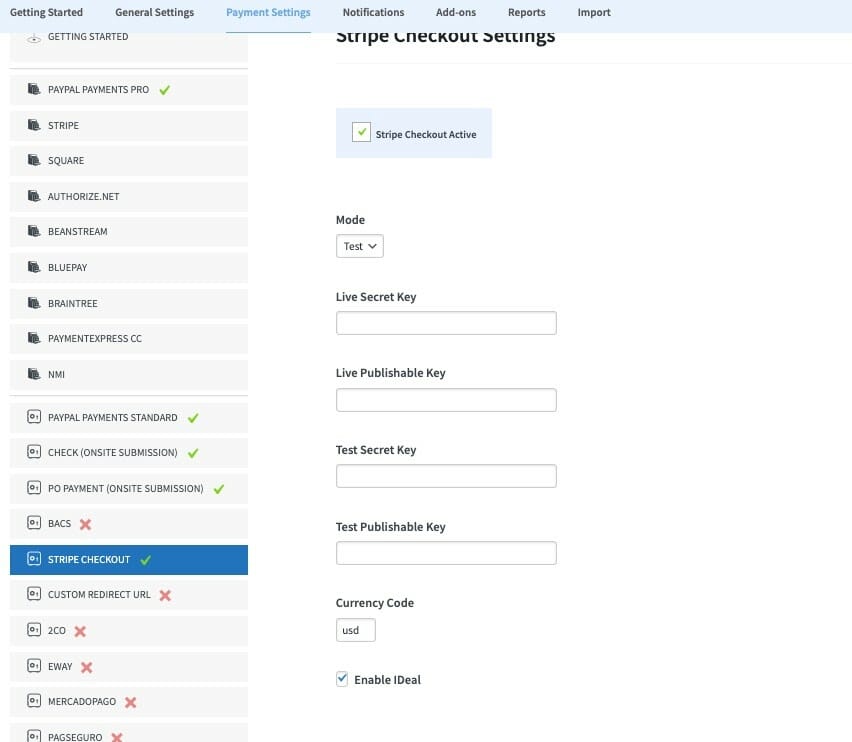
- If you select any of the credit card processors, you will need to configure it as required. This is an example of the settings required by Stripe:

- When you’re done enabling the credit card processors you want to use make sure to click on the blue Save button at the bottom of the screen.
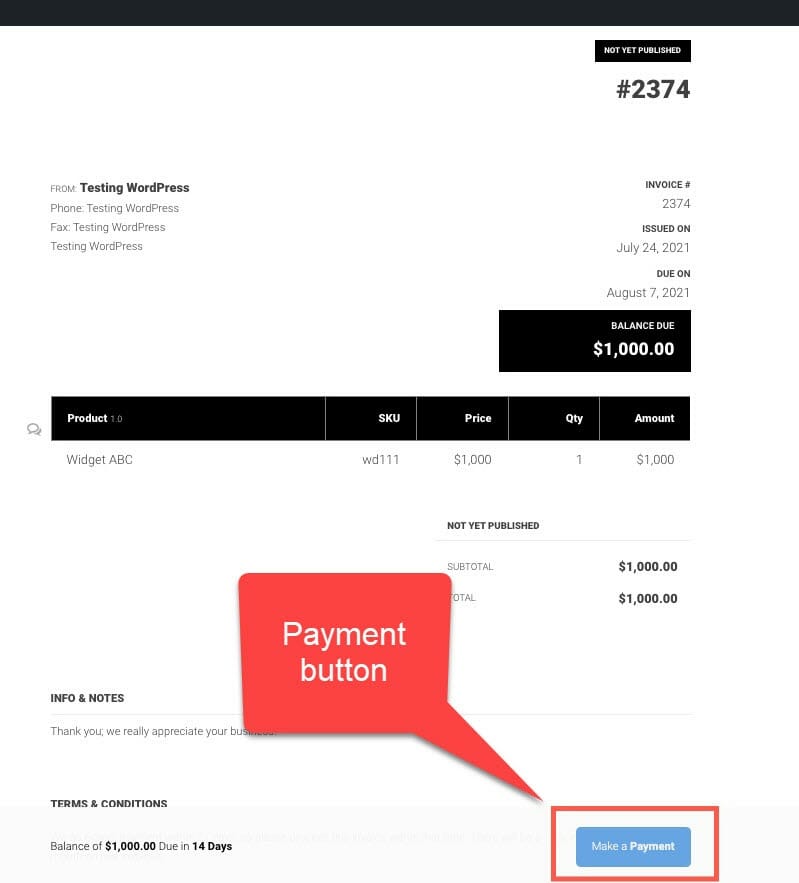
Once the payment settings are enabled, then when a customer opens the link to their invoice, they will see the invoice displayed and the option for making a payment at the bottom of the invoice. This is an example of how it would look:
When you integrate weForms Pro with Sprout Invoices Pro, then you can create an invoice that a website viewer can immediately access via a link. Apart from that option, the integration options for Sprout Invoices include the ability to redirect the customer to the invoice or quote directly after submitting the form.
With the payment settings are properly enabled, you can then begin to collect your fees based on the invoice. The use of the Sprout Invoices payment system allows the customer to securely pay the amount due or some portion of it.
This completes our tutorial of using the integration of Sprout Invoices with weForms. If you want to learn more about using weForms or Sprout Invoices, make sure to check out their website for further documentation.