Sprout Invoices is a WordPress plugin that specializes in creating invoices including various payment methods, application integration, customizable notifications, payment scheduling, and filtering and form actions.
In spite of all its capabilities and complexity, it’s also very easy to quickly create a custom invoice so that you can get paid for a service or product. This guide will take you through the steps of creating an invoice using Sprout Invoices and setting up the payment options so that the payment button works.
- Setting Up the Payment Settings in Sprout Invoices
- Creating an Invoice with Sprout Invoices
Setting Up the Payment Settings in Sprout Invoices
Before you create an invoice, the first thing you will want to do is configure the Payment Settings for Sprout Invoices. This will allow the WordPress plugin to process payments. Any created invoice includes a payment button. This button will not be able to process payments without at least one payment processor configured.
Each of the available payment processor options will require an active and valid account in order to properly process any payments made for your invoice.
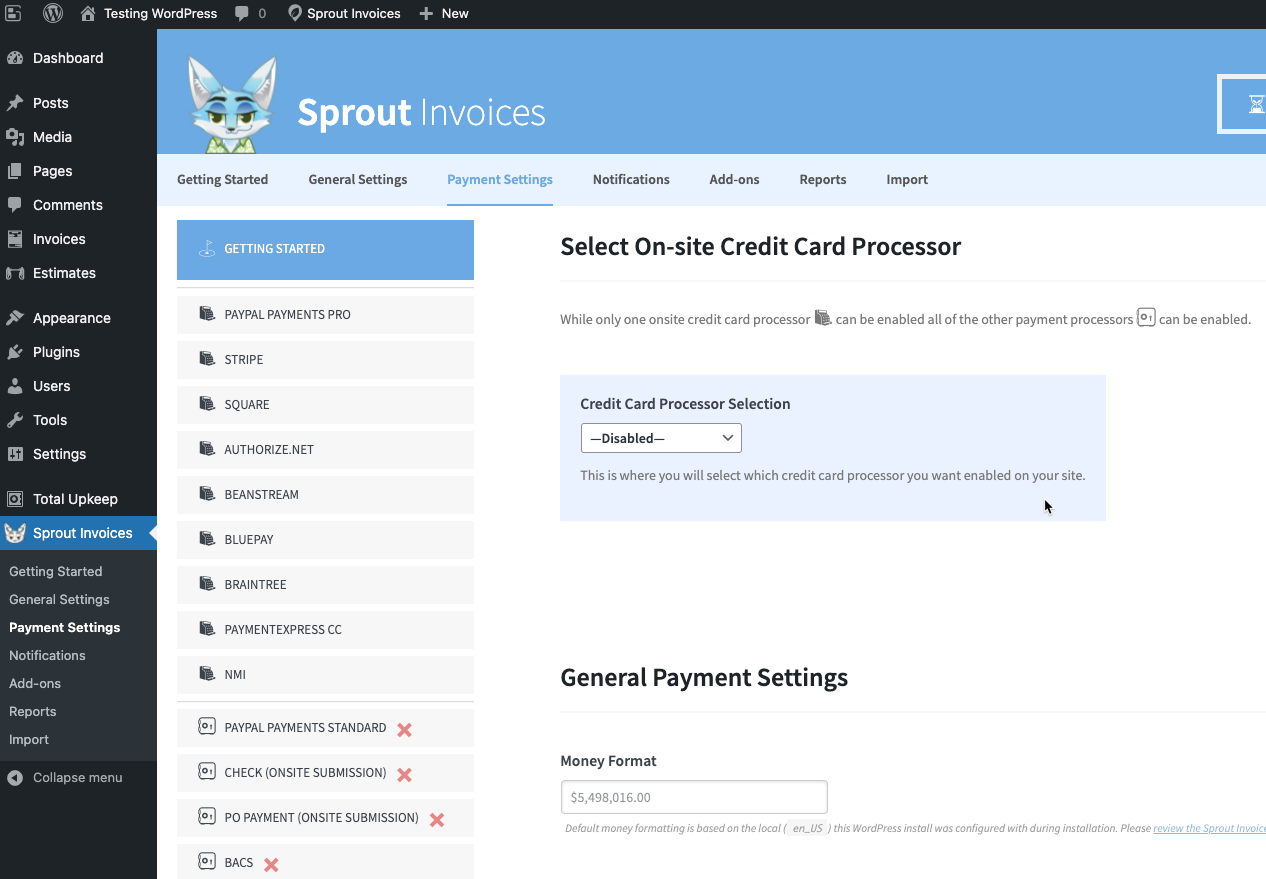
You can see all of the payment processing options available in Sprout Invoices by going to the Payment Settings.
For onsite processing, only one option can be enabled, The payment processing options for online can all be enabled.
Use the following steps to enable the Payment Processing options:
- Log in to the WordPress Administrator.
- In the main menu, click on Sprout Invoices, then click on Payment Settings.
- Notice that there is a list of payment processors. The symbol of a cash register (the darker symbol) and a safe (the lighter symbol) indicate the onsite processor options and online processing options, respectively. Select one onsite processor to use and the online processing options that you want enabled.
- When you have configured the payment processors that you wish to use, click on the blue SAVE button in order to save your changes.
Remember that all payment processor options require that you are registered and have a valid account with that payment processor. You can register for a specific processor by using the name of the processor in a search using your favorite search engine.
Creating an Invoice with Sprout Invoices
1. Add an Invoice

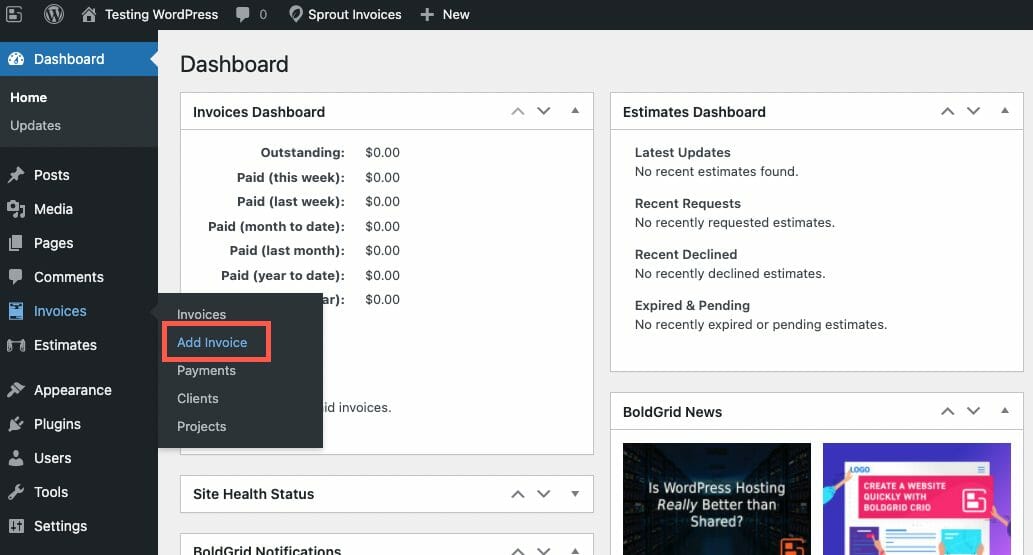
Log in to the WordPress Administrator, then click on Invoices in the menu and select Add Invoice.
2. Name the Invoice and Add Line Items to Invoice

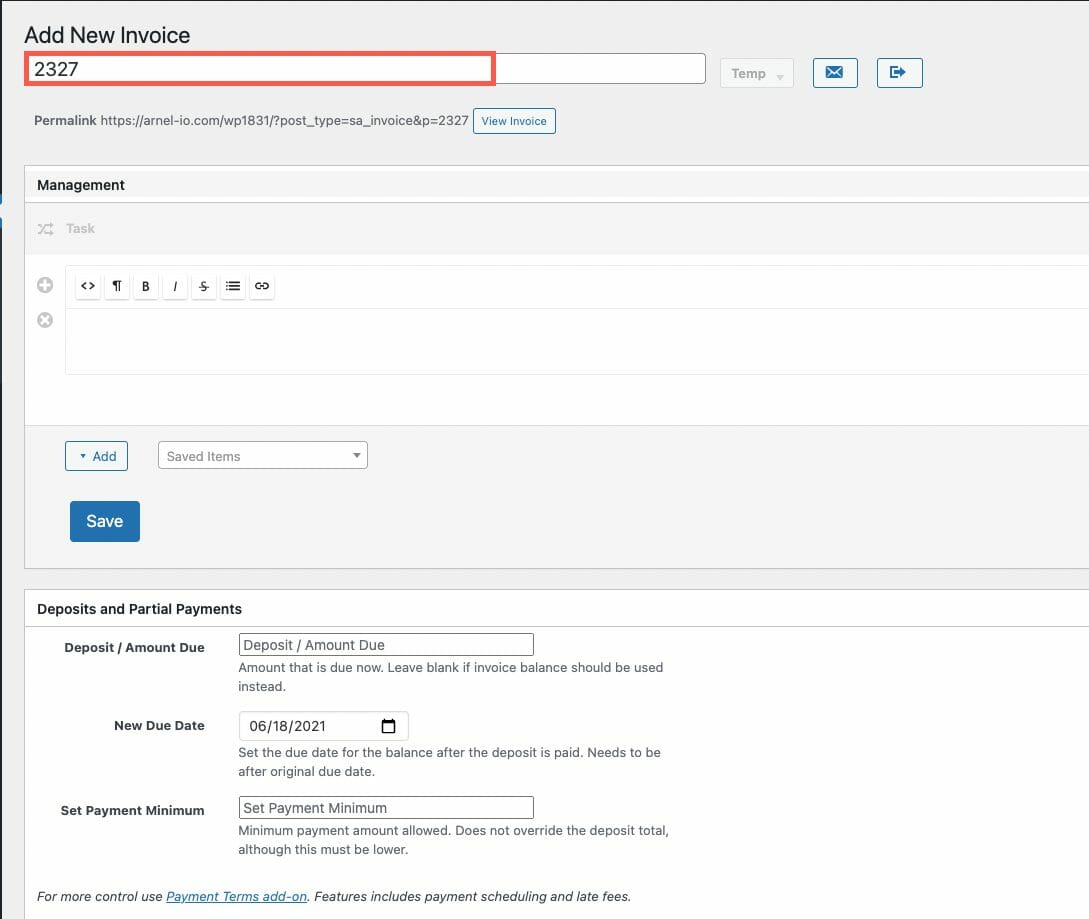
By default, the new invoice will be given a unique number to identify it However, you should give it a name that will be memorable and meaningful. Click in the field with the number to name the invoice.
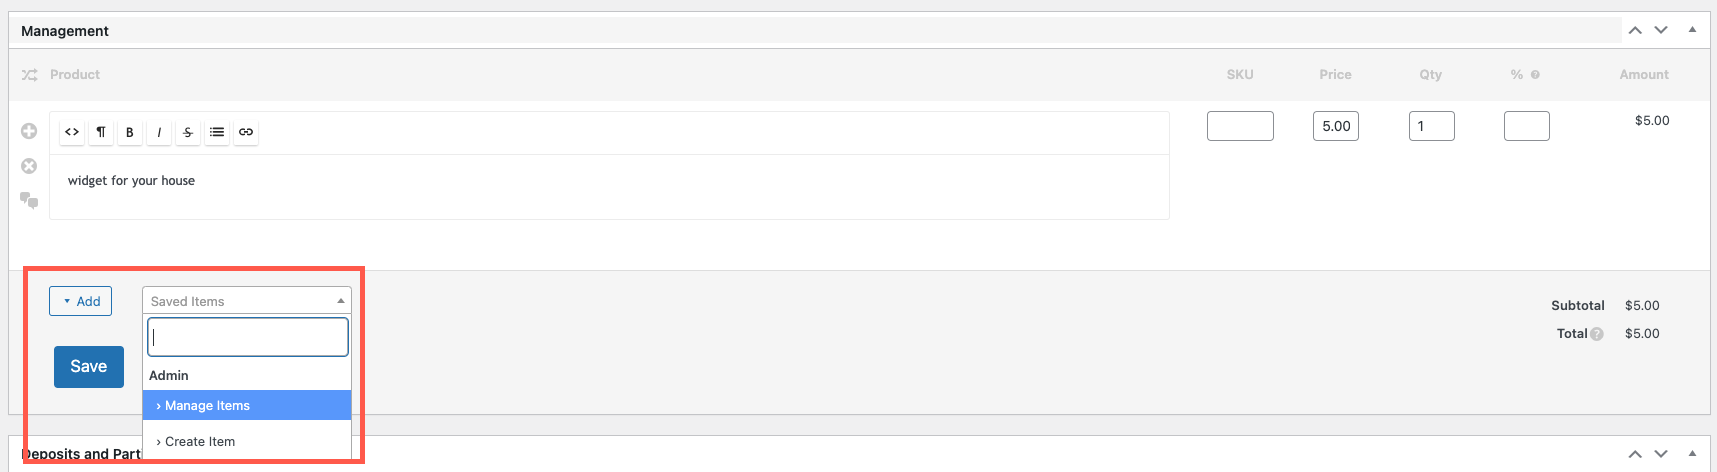
You will then need to add the items you are charging for in the invoice. Click on the ADD button to add a task, service, or product in the Management section of the form. You can also click on the Saved items menu to select any previous items that were saved, or you can create a new custom item.
3. Set a Due Date

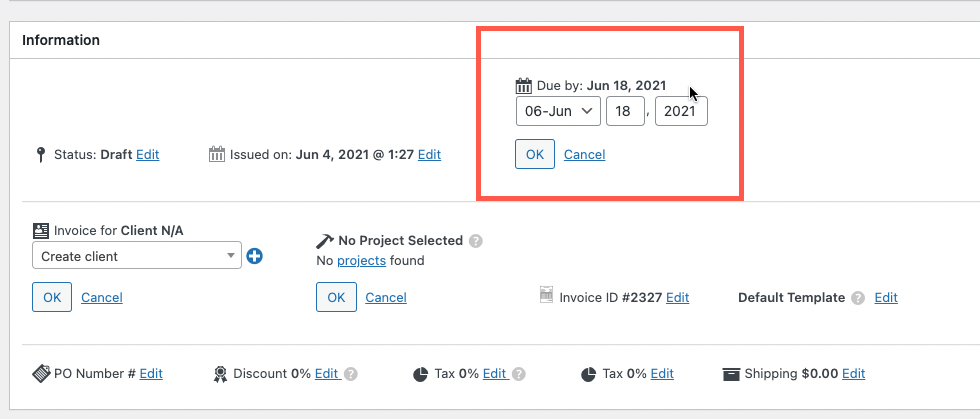
Scroll down to the section labeled Information. Here you can set the due date for the Invoice by selecting the month, date, and year.
Note that you should periodically click on the blue SAVE button in the top right corner to save changes to your invoice as you create it.
4. Create Client

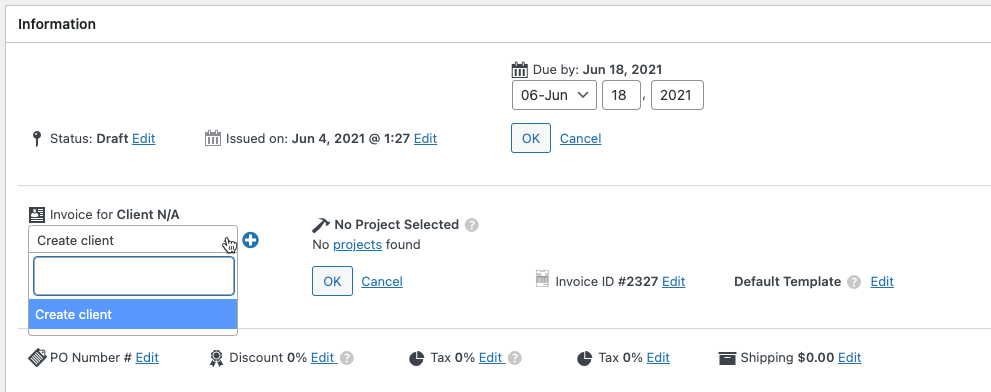
Next, you need to create or select a client for whom the invoice will apply. This is also in the Information section. Click on the plus sign next to the drop-down menu labeled Create client to create a new client. If there are clients already created, then they will appear in the drop-down menu.
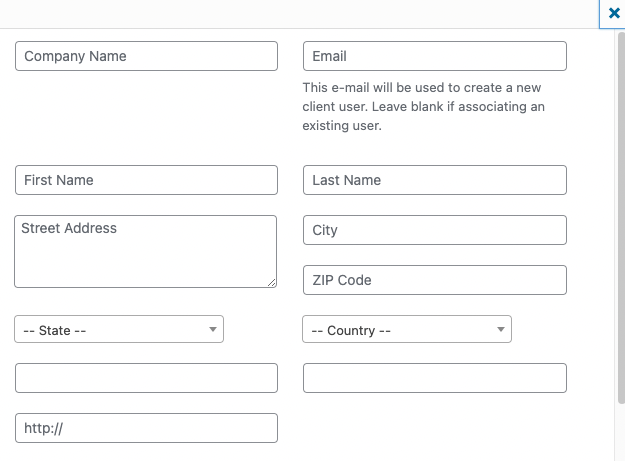
When you create a new client you will see a pop-up window appear where you can add the information for the new client.
5. Send Invoice

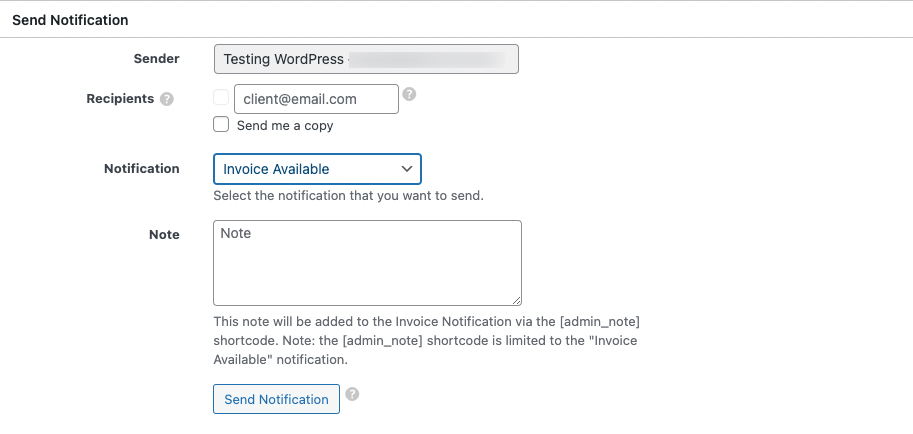
The final step is to set up the notification for the invoice. Click on the email field to select a recipient or add one. You can also choose the notification type using the drop-down menu that is set to Invoice Available by default.
Once you finish setting up the notification, click on the blue SAVE button in the top right corner. With a recipient selected, the notification will be sent via email after the save button has been clicked. The notification will include a link to the active invoice.
That completes the process of creating an invoice and then sending a notification to a recipient. Sprout Invoice provides many more features for invoicing, but these steps allow for a quick simple invoice that can help you get paid for your services or products.
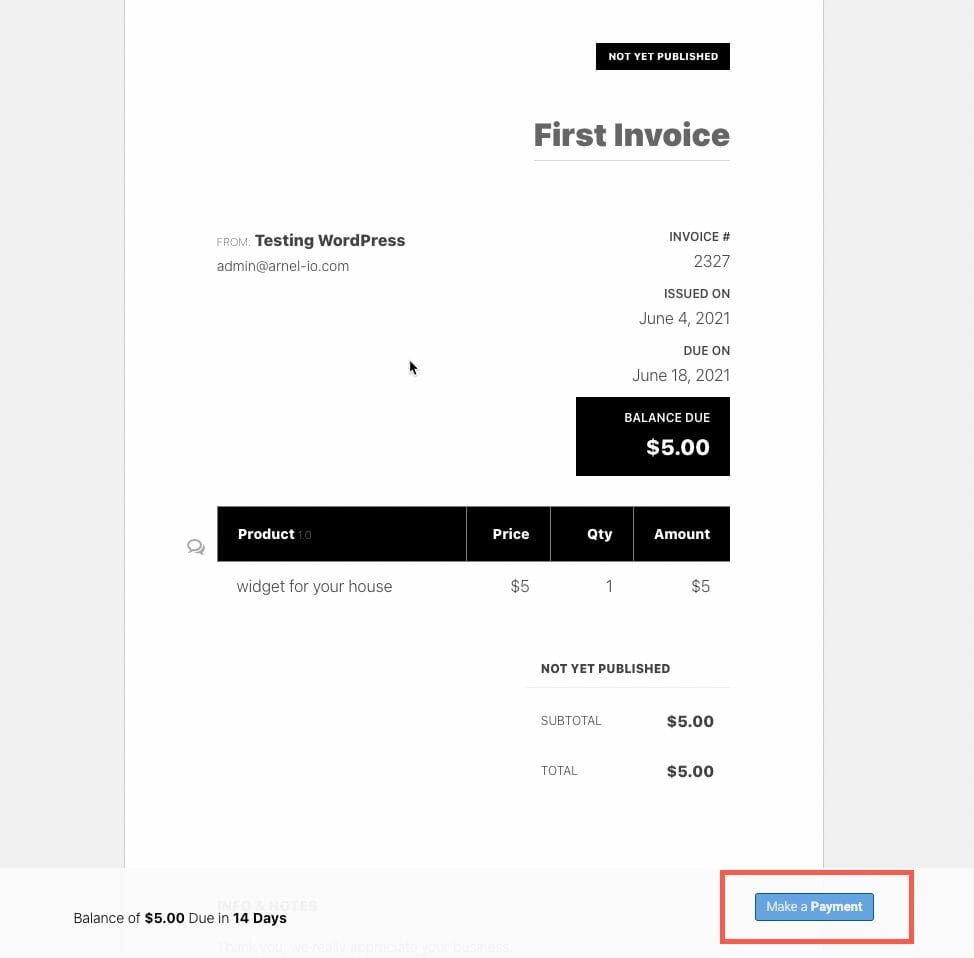
Here’s an example of a completed invoice. Note the Make a Payment button at the bottom of the invoice. This payment option will only work if the Payment settings have been properly configured.
For more information on using and configuring Sprout Invoices, check out the Sprout Invoices website for more information.